Headlights: Problems, Replacement and Safety
Quick answer: Most headlight faults come down to five checks in this order: bulb or module output, connector voltage, ground quality, lens condition, and beam aim. Replace only the failed part, because a new bulb will not fix haze, moisture, bad wiring, or a misaligned housing. This guide follows owner-manual and service-manual logic so you can sort out dim, dead, flickering, cloudy, wet, or misaligned headlights and choose between a bulb, connector repair, lens restoration, aiming, or full assembly replacement.
Wrong guesses cost money and can also cut night visibility, create glare for other drivers, or fail a state inspection. Where this guide mentions condensation behavior and general aim checks, it is framed against owner-manual and service-information practices rather than treating one symptom as universal for every vehicle.
How headlight failures actually happen
What sits inside a headlight assembly
A headlight assembly typically includes the light source, the clear outer lens, the reflector or projector that shapes the beam, seals and rear caps that help keep out moisture, and the mounts that hold aim. In real service, it also includes internal wiring and the external connector that feeds power to the lamp. Damage to any one of those parts can cause weak output, a warped beam, water intrusion, or an intermittent electrical fault.
The lens controls clarity. The reflector or projector sets beam shape. Seals and rear caps block water and dirt. Mounting points keep the beam pointed where the optics were designed to send it. The connector and socket must carry current without looseness, corrosion, or heat damage.
Bulb-serviceable versus integrated LED designs
Many vehicles still use replaceable bulbs. Those assemblies are usually cheaper to keep on the road because you can replace the bulb by itself. By contrast, some vehicles use integrated LED modules, leveling systems, or daytime running lights built into the assembly.
That difference matters before you order parts. On a bulb-serviceable housing, a dead low beam may be a simple bulb job. On an integrated LED unit, the failed part may be the module, driver electronics, or the complete sealed assembly, and some designs do not allow module-level service.
How halogen, HID, and LED systems fail differently
Halogen failures are usually the easiest to isolate. Output falls as the bulb ages, the filament can break, and socket heat damage is common on high-use vehicles. Halogen bulbs also depend heavily on correct bulb geometry, because the reflector or projector was designed around a specific filament position.
HID or Xenon systems use a ballast in many setups and have a brief warm-up period. Factory HID systems use purpose-built optics, which can be either projector- or reflector-based depending on the vehicle. When an HID retrofit is stuffed into halogen optics, glare and poor road focus are common because the light source and the housing do not match. Replacement lighting equipment still has to meet the applicable standards for beam performance, not just look bright.
LED headlights are often marketed as lasting longer than traditional halogen bulbs, but LED failures are less obvious. A bad driver, heat-stressed electronics, poor emitter placement in a replacement bulb, or a sealed module fault can all leave the lamp dim, flickering, or dead. Longevity claims also vary by design and heat management, so vehicle-specific service information matters more than generic package claims.
Why are my headlights dim?
Dim headlights usually come from four common faults: worn bulbs or modules that put out less light, an oxidized outer lens that blocks and scatters the beam, voltage drop at the connector or ground, or aim that points the beam too low or off center. Less often, the reflector or projector inside the housing has degraded. The fix depends on which part changed, because each failure cuts usable light in a different way.
Aged bulbs versus lens oxidation
Start by comparing left and right on the same setting. If both are weak and the lenses look cloudy, yellow, or chalky, the lens may be the main issue. Oxidized lenses can significantly reduce usable light output and nighttime visibility. That is enough to turn an otherwise working low beam into a short, washed-out pattern.
If the lenses are clear but one side is weaker, the bulb itself moves up the suspect list. Halogen output fades before total failure. HID capsules can shift color and dim with age. LED bulbs can lose output if their cooling design or driver electronics are poor.
One beam can look dimmer even after swapping bulbs side to side. That points away from the bulb and toward the assembly optics, the connector, internal reflector damage, or the beam aim.
Low voltage, bad grounds, and connector heat damage
A headlight can glow weakly even when the bulb still works. Corroded connectors, heat-darkened sockets, loose terminals, and poor grounds add resistance. The lamp then sees less voltage, especially once heat and vibration build during a drive.
Pull the connector and inspect it closely. Green or white corrosion, browned plastic, a terminal that backs out, or a socket that grips loosely are better clues than ordering a fresh bulb. Intermittent flicker after bumps often points to terminal tension or a cracked wire near the connector, not the lamp itself.
Suppose the right low beam works for ten minutes, then flickers on rough pavement and returns after cooling. That pattern fits heat or vibration at the connector better than a dirty lens. The cheap mistake is replacing a good bulb and leaving the melted socket untouched.
Reflector or projector wear inside the housing
External polishing does nothing for internal optical damage. If the lens is clear and the bulb is known good, yet the beam is patchy, dull, or scattered, the reflector coating or projector bowl may be failing. Moisture and age can speed up that damage.
This is also where used assemblies can disappoint. A used lamp may look fine on a shelf, then throw a weak beam because the internal optics are already worn. Replacement, not restoration, is usually the lasting fix.
Bad aim that mimics weak output
A low beam aimed too low can feel dim because usable light lands only a short distance ahead. Aim it too high and road reach may seem better to the driver, but foreground control drops and glare rises for oncoming traffic.
Misalignment can happen after bulb replacement, front-end impact, suspension changes, assembly replacement, or broken mounting tabs. A level-surface wall check can help you spot obvious aiming problems, but final adjustment still has to follow the vehicle’s own specification.
One headlight not working: bulb, fuse, or wiring?
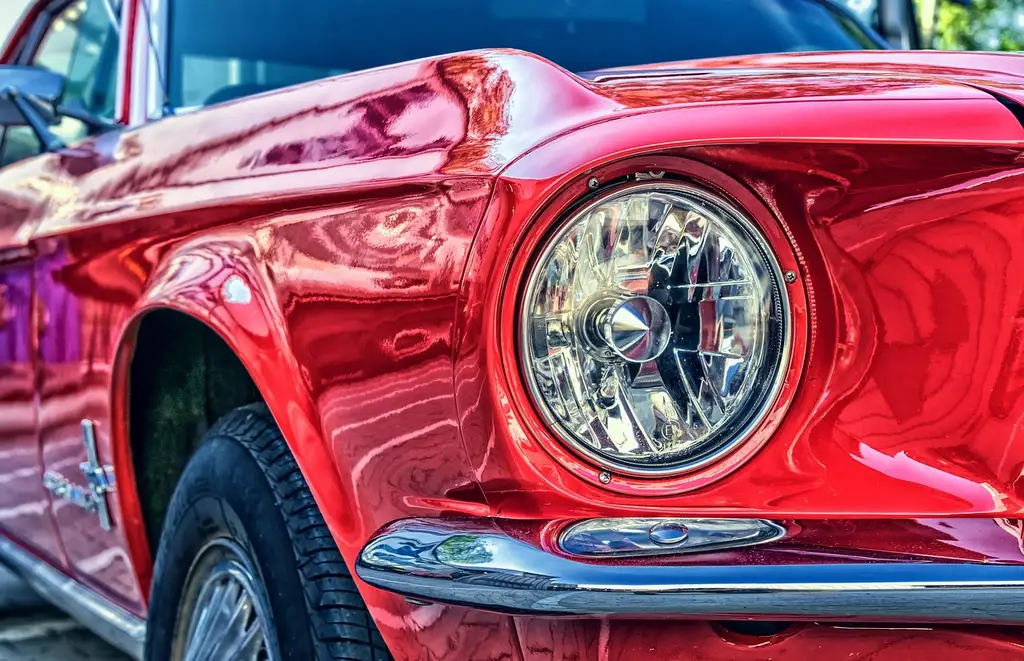
Check the simplest service item first, then move outward: bulb, fuse if the vehicle uses separate headlight fusing, connector, ground, ballast or LED driver, wiring, and finally the control side. That order helps you avoid replacing assemblies for faults caused by a burned bulb, a melted socket, or a loose terminal.
The fastest isolation order that avoids wasted parts
- Confirm whether low beam, high beam, DRL, and turn functions on that side all fail or only one does.
- Swap the bulb side to side if the design uses the same replaceable bulb and access is reasonable.
- Check the fuse only if the wiring diagram or owner information shows a separate fuse path for that lamp.
- Inspect the connector, socket, and ground for heat, corrosion, looseness, or water traces.
- On HID, check ballast, igniter, and warm-up behavior.
- On LED, verify whether the failure is a replaceable bulb, a driver, or a sealed module inside the assembly.
If the problem moves with the bulb, the bulb is bad. If it stays on the same side, keep checking the socket, ground, power feed, ballast, driver, or assembly.
Socket corrosion, melted connectors, and loose terminals
Connector faults are one of the easiest ways to waste money. A socket can look acceptable from the outside while one female terminal has lost tension inside. That can cause flicker, a dead lamp after rain, or a lamp that comes back when the harness is jiggled.
Look for heat discoloration, melted plastic, brittle insulation, corrosion, and terminals that spread apart. On some vehicles, the connector pigtail is repairable by itself. On others, part of the internal headlight wiring is tied to the assembly, so a housing-level repair may be required.
HID ballast and igniter checks
Factory HID systems can use projector or reflector optics and usually a ballast to start and regulate the arc. A failing ballast may give no start, repeated flicker, or a lamp that flashes and goes dark. The bulb can also age out, but ballast and igniter faults are common enough that bulb-only guessing gets expensive fast.
If one side is purple, slow to reach full brightness, or dies after ignition, compare components using the service information for that model. Do not assume a halogen-style diagnosis applies. HID parts and wiring paths are different.
LED driver, module, and control faults
With LED systems, the failed part may be the replacement bulb, the cooling fan or heat sink, a separate driver, or a non-serviceable module in the assembly. Daytime running lights can add confusion because a DRL strip may still work while the low-beam LED element has failed.
Picture a crossover with bright DRLs but no usable low beam on the left at night. That does not prove the assembly is healthy. It often means one lighting circuit still works while the low-beam driver or module does not.
Headlight failure decision table
| Symptom | Likely cause | Quick at-home check | Safe temporary action | Best permanent fix |
|---|---|---|---|---|
| One halogen low beam out | Burned bulb, melted socket, blown fuse if separately protected | Swap bulb side to side; inspect socket for browning or looseness | Drive only in daylight if the other required lamp is also weak or aim is poor | Replace bulb if failure follows bulb; repair socket or wiring if not |
| One HID low beam out | Aged HID capsule, ballast or igniter fault | Note warm-up behavior; compare side to side if service procedure allows | Avoid night driving if only one low beam remains | Replace failed capsule, ballast, or igniter with matching parts for the system |
| One LED headlight out | Driver failure, module fault, wiring issue, or non-serviceable assembly failure | Confirm whether DRL still works; check connector and vehicle-specific service info | Do not rely on DRL as a substitute for a failed low beam | Replace the failed LED bulb, driver, module, or complete assembly as designed |
| Both headlights dim | Lens oxidation, low system voltage, aged bulbs, poor aim | Inspect lens clarity; compare beam height on a wall; check for slow cranking or other voltage clues | Reduce speed at night and avoid long trips until corrected | Restore or replace lenses, replace aged bulbs, repair voltage or ground issue, then aim lights |
| One side dim with clear lens | Bad ground, connector heat damage, internal reflector or projector wear | Swap bulb if serviceable; inspect connector and compare beam pattern on wall | Use only for short daylight travel if road visibility is affected | Repair wiring or replace assembly if optics are degraded |
| Flicker over bumps or after rain | Loose terminal, corrosion, moisture intrusion, cracked wiring | Wiggle-test harness gently with lights on; inspect for green corrosion and water traces | Stop using that lamp circuit if flicker becomes rapid or both lights are unstable | Repair connector, seal leak source, replace damaged pigtail or housing |
| Cloudy yellow lens | Outer lens oxidation | Clean the surface; if haze remains on the outside only, oxidation is likely | Night driving should be limited if the beam is short or scattered | Use a restoration kit for surface haze or replace the assembly if damage is deeper |
| Fogging, droplets, or water in housing | Failed seal, cracked lens, damaged rear cap, housing crack | Distinguish light mist from repeated fogging, droplets, or pooled water | Drying alone is temporary; avoid night driving if output is reduced or wiring is wet | Replace missing cap, reseal only if the leak path is clear, or replace assembly |
| Beam points high or crooked after repair | Misalignment, broken mounting tab, wrong bulb seating | Check bulb seating and inspect beam on wall at 25 feet | Do not use high aim on public roads | Reseat bulb, repair mounts, and adjust aim to the manufacturer spec |
Are cloudy or moisture-filled headlights unsafe?
Yes, they can be unsafe for two separate reasons. Cloudy lenses scatter and block light before it reaches the road, while water intrusion damages optics and electrical parts inside the housing. The risk rises when beam distance shrinks, glare increases, or the lamp starts flickering, fogging repeatedly, or collecting visible droplets.
Lens haze, yellowing, and light scatter
Outer lens oxidation is common and often visible in daylight. If the plastic looks chalky or yellow, the beam usually loses reach and edge definition at night. A basic DIY headlight restoration kit is commonly sold in the roughly $15 to $25 range at major auto-parts retailers such as 3M, Sylvania, and store-brand kit listings, though prices vary by kit size and included sealant.
Restoration works best for surface haze. It does not repair internal reflector damage, cracks, failed seals, or broken tabs. If the lens is deeply crazed, the inside is stained, or the beam is still poor after polishing, assembly replacement makes more sense.
Normal condensation versus leak-related water intrusion
A small amount of light condensation can happen in some conditions. That alone is not proof the lamp is bad. Repeated fogging, droplets, or pooled water usually signal a failed seal or crack.
Moisture inside the housing can shorten bulb life and corrode electrical contacts. A cracked lens or housing can let in water and dirt and affect performance. Missing rear caps, damaged vent paths, and impact cracks are common causes. Brief mist that clears during operation can be normal, while standing water, recurring heavy condensation, or visible droplets indicate a leak path that needs repair.
Say your left lamp shows a brief light mist on a cold morning, then clears after the beams run. That can be normal. If the same lamp shows beads of water at the bottom after every wash, that is a leak problem, not harmless condensation.
When restoration is enough and when replacement is overdue
Restore the lens when the problem is outer haze only and the beam pattern still looks structurally correct. Replace the assembly when you have cracks, broken mounting tabs, severe corrosion, failed seals, internal reflector damage, or an unsafe beam pattern that polishing cannot change.
How to replace a headlight bulb at home
Home bulb replacement is practical when the assembly was designed for it and access is reasonable. Verify the exact bulb type first, avoid touching halogen glass, and make sure the weather cap and connector seat fully during reassembly. If the system is HID or an integrated LED design, check the service path before opening anything.
Find the exact bulb type before opening the housing
Use the owner manual, a reliable parts catalog, and the housing design itself. Do not buy by shape alone. Low beam, high beam, DRL, and fog lamp bulbs can differ even within the same front corner.
Safe removal and installation steps for halogen bulbs
- Turn the lights off and let hot components cool.
- Open the access cover or remove the rear cap.
- Disconnect the connector without pulling on the wires.
- Release the retaining ring, spring, or twist-lock.
- Remove the old bulb and compare the base and indexing tabs.
- Install the new bulb without touching the glass.
- Reconnect the socket, refit the cap, and confirm the seal is even.
- Test low and high beams, then check aim against a wall.
Extra cautions for HID and LED replacements
HID systems use high-voltage components, so bulb replacement is not the same as halogen service. LED replacements add fitment issues: heat sinks, fans, driver boxes, and emitter placement can interfere with dust caps or alter the beam pattern if the bulb design does not match the housing.
Do not assume an LED or HID bulb swap is a simple upgrade for a halogen reflector. If the optics are mismatched, glare rises and road focus gets worse even if the light looks brighter up close. Whether a retrofit is road-legal depends on the exact lamp, housing, and jurisdiction, so the cautious approach is to use only lighting equipment specified for that application and verify compliance locally.
Post-install checks for caps, seals, and beam pattern
After any bulb work, confirm the rear cap is fully seated and the bulb is locked in its indexed position. A slightly crooked bulb can throw a beam that looks like a bigger electrical problem. Then check the pattern on a wall before driving at night.
How to choose the right headlight part
The right part is the one that matches the housing design, connector, electronics, and legal fitment for the vehicle. Start with the vehicle’s specified bulb or assembly, then decide between OEM, aftermarket, and used based on beam quality, sealing, and cost risk rather than chasing the brightest advertised option.
Bulb selection by housing design and fitment
Halogen reflectors and projectors are optimized for a specific filament location. Replace with the exact approved bulb type. For LED replacement bulbs, emitter geometry and heat management matter. If the emitters sit in the wrong place relative to the reflector or projector, the beam can become patchy or glaring.
Color temperature restraint matters too. Very blue-looking bulbs may seem intense at first glance but can reduce useful road contrast in bad weather. Staying close to the intended optical design is usually the smarter path.
OEM, aftermarket, and used assembly tradeoffs
OEM assemblies usually offer the safest bet for optical quality, fit, sealing, and compatibility with auto-leveling or adaptive functions. Aftermarket assemblies range from acceptable to poor, and fit, lens durability, beam pattern, and sealing vary widely. Used assemblies cost less but may already have internal wear, hidden cracks, or mounting damage.
When an LED module or full assembly is the only real fix
If the LED source is built into a sealed module, there may be no bulb to replace. The same applies when the failure is in internal wiring, non-serviceable driver electronics, or adaptive hardware integrated into the headlamp. In those cases, partial fixes usually turn into repeat labor and more cost later.
How to adjust headlights without a machine
A simple wall check can catch bad vertical or left-right aim before it becomes a glare problem. Park on level ground, face a wall or garage door, and inspect the low-beam pattern. If the pattern is uneven, too high, or obviously off-center, correct aim or broken mounting issues before driving at night.
A simple wall check for vertical and horizontal aim
Use a level parking surface. Make sure tire pressures are normal and the vehicle is not heavily loaded on one side. Turn on low beams and look for symmetry. Large left-right differences suggest an aiming issue, wrong bulb seating, or a bent mount.
What a correct low-beam pattern should roughly look like
A correct beam should look controlled and repeatable from side to side, without excessive light scattered high into oncoming traffic. Some low beams have a sharp cutoff, while others are less crisp depending on the vehicle and market. If the pattern blooms upward or looks badly distorted, suspect the bulb fit, housing optics, or internal damage.
Signs broken mounts or prior impact are affecting aim
If the lamp housing feels loose, the gaps around the bumper and fender changed after a hit, or adjustment screws no longer move the beam predictably, look for broken tabs or structural mounting damage. Aiming screws cannot compensate for a housing that no longer sits square.
How much does headlight replacement cost?
Headlight replacement cost depends more on the failure mode and vehicle design than on the word “headlight.” A bulb-only job can be cheap, while an integrated LED or adaptive assembly can be expensive in parts and labor. The biggest cost mistakes come from replacing the wrong part or buying poor optics twice.
Price ranges by scenario
Bulb-only halogen replacement is usually the low-cost path. A socket or pigtail repair adds parts and wiring labor but still costs less than a full assembly on most cars. Lens restoration is often the cheapest optics fix, with a basic DIY kit commonly priced at about $15 to $25 at major auto-parts retailers.
Used assemblies can save money upfront, but the risk is hidden haze, weak reflectors, leaks, or broken tabs. Aftermarket assemblies vary in cost and quality. OEM assemblies usually cost more but reduce fit and beam-pattern uncertainty. HID ballasts and LED modules can land in an awkward middle ground, less than a whole lamp in some cases, unavailable separately in others.
Why some jobs take minutes and others need bumper removal
Access drives labor. Some bulbs are reachable behind a rear cap in minutes. Others require the air box, battery tray, inner fender liner, or front bumper cover to come off. Assembly replacement can also mean aim calibration, adaptive-light checks, or electronic setup on newer vehicles.
Cost drivers for halogen, HID, adaptive, and integrated LED systems
Halogen systems tend to have lower parts cost and simpler labor. HID adds ballast and igniter variables. Integrated LED and adaptive systems raise the parts bill and can increase setup time after installation. If the assembly also includes DRLs, leveling motors, or control electronics, replacement gets expensive fast.
What to do if headlights fail while driving
If headlights fail while driving, reduce speed, switch on hazard lights as appropriate, and move to a safe place off the road as soon as practical. Do not continue normal night driving on guesswork. If visibility is poor, both low beams fail, or the remaining lighting is not legal for the road, stop driving.
Immediate steps to stay visible and reduce risk
Stay calm and keep steering smooth. Try the headlight switch once, then the high beams if they are still working and traffic conditions allow. If only one low beam remains, slow down sharply and avoid dark or high-speed roads. Hazard lights may help other drivers notice a disabled vehicle, but they do not replace required forward lighting.
- Ease off the throttle and increase following distance.
- Keep both hands on the wheel and avoid abrupt lane changes.
- Use turn signals early if you need to move toward a shoulder or exit.
- If street lighting is poor, treat the situation as an emergency stop rather than a minor inconvenience.
When to pull over instead of continuing
Pull over if both headlights go out at night, if the beam is so weak that lane edges disappear, if the lamp is flickering unpredictably, or if water intrusion has reached the connector area. Continuing under those conditions is a visibility and legality problem, not just an inconvenience.
If you are on a freeway, aim for the nearest shoulder, emergency bay, or well-lit exit rather than trying to “make it home.” If you are on a local road, use the first safe parking lot, side street, or shoulder with enough room to get fully clear of traffic. Once stopped, leave the vehicle only when it is safe to do so.
High beam, fog lamp, and hazard-light limits
High beams are not a substitute when there is oncoming traffic or a vehicle ahead. Fog lamps are also not a replacement for failed low beams. Rules on emergency flashers and lighting use vary by jurisdiction, so the safe approach is to use them only to get stopped safely and avoid treating them as permission to keep driving normally.
Daytime running lights do not solve this problem either. On many vehicles, DRLs are dimmer than low beams and may not activate the tail lamps. That can leave you less visible from the rear even if the front of the vehicle still appears lit.
What to check after you have stopped safely
Once you are parked out of traffic, look for the simplest clues first: a recently failed bulb, a loose rear cap, a connector that has come unplugged, obvious water in the housing, or a fuse listed for that lamp in the owner manual. Do not keep cycling HID or LED systems repeatedly if you smell burning plastic, see smoke, or find a melted connector.
If a quick bulb swap or fuse check is not clearly possible and legal roadside conditions are poor, the safer call is a tow or daylight repair. Service-manual logic matters here: many modern headlamps share modules, body-control logic, or bumper-level access steps that are not practical or safe on the shoulder of a road.
Frequently asked questions
How to choose the right headlight bulb for my car
Check the owner manual, a reliable parts catalog, and the housing type before buying. Match the exact bulb number and base, because reflector and projector optics are designed around a specific light-source position. Avoid treating LED or HID swaps into halogen optics as a simple upgrade unless the housing was built for them.
When do headlights need full assembly replacement?
Replace the whole assembly when the lens or housing is cracked, mounting tabs are broken, seals have failed, the internal reflector or projector is damaged, corrosion is severe, or the LED source is non-serviceable. Replacement is also the right call when the beam pattern is unsafe and polishing or aiming cannot correct it.
When may you not use headlights?
If your real concern is a failure rather than normal headlight use, do not keep driving at night when both headlights are out, when the remaining beam is too weak to see safely, or when the lighting left on the vehicle is not legal for the road. Misuse can also include running high beams in traffic or relying on DRLs as if they were full low beams.
Quick FAQ
- At night, it is usually a bad idea because visibility and legality both suffer.
- Is light condensation inside a headlight always a problem? No. Light mist that clears can be normal. Droplets, recurring heavy fogging, or pooled water usually mean a leak.
- Will polishing fix every cloudy headlight? No. It helps outer-surface oxidation, not cracked lenses, failed seals, or damaged internal reflectors.
- Owner manuals and inspection guidance commonly recommend checking aim after service or front-end repairs.
- Are LED replacement bulbs always legal in halogen housings? No. Fitment and legality depend on the exact lamp, housing, and jurisdiction.