Oil Change: When, Why, and How to Do It Right
Change engine oil when the owner’s manual says it is due by mileage or time, or when the oil-life monitor reaches service, and move the job up for short trips, towing, dust, long idling, or track use; still require the exact oil spec listed for that engine. Wait too long or pour in the wrong oil, and you raise the risk of sludge, low oil pressure, timing-chain wear, leaks, or a denied warranty claim. This guide covers when an oil change is due, why intervals shift, and how to do the job safely with ramps, jack stands, or a service bay.
The first decision is simple. Some cars need a full oil change, some only need oil added, and some need a fault checked before any routine service. Access matters as well. A low sedan with a front splash shield is a very different DIY job from a truck with an exposed drain plug and a vertical spin-on filter.
Start here: change now, check now, or wait
Signs you should change the oil soon
Change the oil soon if the manual’s mileage or time limit is close, the oil-life monitor shows service due, or the car has seen severe use such as repeated short trips, long idling, towing, hauling, heat, or dust. Older high-mileage engines also need closer level checks between scheduled services.
Routine triggers are different from warning symptoms. An overdue oil change is a maintenance issue. A sudden drop on the dipstick, a fresh leak, smoke, or an oil-pressure warning light points to a problem that should not wait for the next planned interval.
Signs you should stop and check the engine now
Stop and check now if the oil-pressure light comes on, the dipstick shows low oil, there is a burnt-oil smell, smoke appears from the engine bay or exhaust, or fresh oil spots form under the car. Those signs can point to oil loss, overheated oil, or low pressure.
Suppose the dipstick read normal last week, but today it is suddenly below the safe range and the engine smells hot after a 20-minute commute. That is not a wait-until-Saturday problem. Check for leaks, verify the level, and avoid driving until you know the cause.
Oil change vs. oil top-off vs. diagnosis
An oil change replaces used oil and usually the filter. A top-off adds oil because the level is low, but it does not remove contamination or restore depleted additives. Diagnosis comes first when the level drops quickly, warning lights appear, or leaks and smoke show up.
- Change the oil when the interval is due and the engine is otherwise behaving normally.
- Top off when the oil is below full but the service interval is not due yet and there is no sign of sudden loss.
- Inspect urgently when low oil returns quickly, the oil-pressure light appears, leaks are visible, or the engine smells burnt.
When should I change my oil?
Change your oil at the mileage limit, month limit, or oil-life-monitor point listed in the owner’s manual, and shorten that interval for short trips, towing, hauling, heat, dust, or long idle time. Suddenly low oil is a different issue, and that means you should check the engine before waiting for routine service.
Mileage, time, and oil-life monitor triggers
Three triggers matter: mileage, calendar time, and the car’s maintenance monitor. Service intervals vary by vehicle, and the owner’s manual sets the mileage and time limits. (Wikihow)
If the manual sets a time limit, viscosity requirement, severe-service schedule, or oil-life-monitor procedure, follow that first.
What the owner’s manual overrides
The manual gives the correct oil viscosity, total oil capacity, filter type, service interval guidance, and any vehicle-specific requirements such as synthetic-only oil or a new drain-plug washer at each service. Check it before you buy supplies, not after the drain pan is full.
Use the manual to confirm:
- Viscosity, such as 0W-20 or 5W-30
- Oil specification or approval required by the engine
- Oil capacity with and without filter change if listed
- Filter style: spin-on or cartridge
- Drain-plug washer or gasket requirement
- Time-based and mileage-based service intervals
Why overdue oil is different from suddenly low oil
Overdue oil means the fluid has stayed in service too long. Suddenly low oil means the engine may be consuming or leaking oil right now. Those are different faults, and only one is fixed by scheduled service.
Picture a crossover that is 800 miles past its scheduled interval but still shows a steady full mark on the dipstick. That needs a prompt oil change. Picture the same vehicle one week later with a fresh puddle near the right-front wheel and a low dipstick. That needs leak diagnosis first.
When to swap the oil filter along with the oil
Most full services involve replacing both the oil and the filter simultaneously, as old filters trap contaminants that dilute the benefits of fresh oil. A standalone filter change is generally unnecessary unless your current fluid is still fresh but the old filter is damaged or clogged. Skipping the filter swap during a full drain risks retaining trapped sludge and compromising pressure.
The oil filter decision matrix details how to identify when a filter-only repair is safe versus when a complete refresh is required for optimal engine longevity.
Oil service decision table
| Driving pattern | Likely service interval trigger | DIY complexity | Stop and check now |
|---|---|---|---|
| Normal commuting, engine fully warms up most drives | Follow the manual’s mileage, time, or oil-life monitor guidance; many cars land between 5,000 and 10,000 miles | Low to moderate if filter and drain plug are accessible | Low dipstick, warning light, leak, smoke, or burnt smell means inspect now |
| Short-trip, idle-heavy, repeated cold starts | Use the severe-service schedule if listed; time can matter as much as mileage | Low to moderate, but expect more frequent checks between services | Fuel smell in oil, sudden level drop, or rough running with low oil needs attention |
| Towing, hauling, mountain driving, hot weather, dusty roads | Shorter intervals than normal service; follow manual guidance for severe use and required oil spec | Moderate because trucks and SUVs may take more oil and use larger filters or skid plates | Burnt-oil smell, smoke, fresh seepage near filter or plug, or pressure warning should stop the trip |
| Older high-mileage vehicles with mild oil use | Check level more often and do not rely on mileage alone if consumption is increasing | Moderate; rusted fasteners, stuck filters, and brittle splash clips can add time | Blue smoke, fast consumption, drips overnight, or recurring low oil needs diagnosis |
Why does the interval change by driving pattern?
Oil-change intervals change because driving changes oil stress. Short trips leave less time to evaporate moisture and fuel dilution, towing raises heat load, dust adds contamination risk, and older engines may consume oil between services. The severe-service schedule in the manual is the best starting point in these cases.
Normal commuting
A car that regularly reaches full operating temperature on longer drives usually fits the normal schedule in the manual. That is why one-size-fits-all advice like “always every 3,000 miles” is too broad for modern engines.
Short trips and idle-heavy use
Frequent cold starts, school-run miles, delivery use, and long idle periods are hard on oil even when mileage stays low. The engine may rarely stay hot long enough to boil off moisture and fuel contamination.
That is where time-based intervals matter. A car can be overdue by months before it is overdue by mileage.
Towing, hauling, heat, and dust
Heavy loads and hot weather raise oil temperature. Dusty conditions can add contamination risk. Repeated hard climbing or hauling puts a very different load on the lubricant than steady highway cruising.
Some vehicles should use synthetic oil. If the manual specifies synthetic, use it. Synthetic usually costs more than conventional oil, but that requirement comes from the engine’s design and service needs.
Older high-mileage engines
Older engines may use more oil between changes, even when they still run well. That does not automatically mean they need a different viscosity than the manual states, but it does mean the dipstick needs more attention.
Many engines need at least a gallon of oil in the crankcase, so being a quart low can be a large share of total capacity. Check level regularly on older engines, especially before trips.
Low-Mile Drivers: Why the Calendar Beats the Odometer
Most drivers assume high mileage wears out oil, but infrequent use or short trips actually degrade it faster through condensation and acid buildup. If you drive under 5,000 miles a year, your owner’s manual likely mandates a 6- to 12-month change, regardless of the odometer. Ignoring this date leaves sludge forming in the engine while the car sits. Time-based oil change limits explain how to read these specific intervals and why synthetic oil does not fully eliminate the need for calendar tracking. Following this schedule prevents internal corrosion that mileage-only habits miss.
How do I know what oil my car takes?
Your car takes the viscosity, specification, and quantity listed in the owner’s manual or on the under-hood service label. Check that before you buy oil or a filter. The right answer includes more than “synthetic or conventional”; it also includes the exact grade, the oil capacity, and the correct filter type.
Find the right viscosity and specification in the manual
The manual may list one grade or several grades by temperature range. Car and Driver says some modern cars use 0W-20 oil, and Car and Driver says some modern cars use 5W-30 oil. Those are examples, not substitutes for the grade specified for a particular engine.
If the manual also requires a specific approval standard, meet that too. Viscosity alone is not the full spec.
0W-20 vs. 5W-30 and what the numbers mean
The first number with the W relates to cold-temperature flow. The second number relates to viscosity at operating temperature. Lower winter numbers generally help cold-start flow, while the complete grade still has to match what the engine was designed to run.
Do not switch grades because a store shelf is out of stock. Match the manufacturer recommendation unless the manual gives approved alternatives by climate.
Synthetic, blend, or conventional
Some vehicles require synthetic oil. Others allow conventional or blend oils if the grade and spec match.
The manual decides the requirement. Cost does not override it.
How to confirm oil capacity before draining anything
Check the manual for total oil capacity and whether that figure includes a filter change before you loosen the drain plug. That number tells you how large the drain pan should be, how much oil to buy, and how carefully to measure the final fill.
Do not guess from a parts-store screen alone. Capacity, cartridge-filter volume, and even plug-washer type can change within the same model line.
What tools do you actually need?
You need the correct oil, the correct filter, a drain pan large enough for the engine’s full used-oil volume, the tool for the drain plug, a safe way to reach the underside, and cleanup items. Beyond that, the exact setup depends on filter access, splash shields, and ride height.
Minimum supplies for any oil change
- Engine oil in the grade and spec listed in the manual
- New oil filter
- Drain-plug socket or wrench in the correct size
- Replacement drain-plug sealing washer or gasket if required
- Oil drain pan sized for the engine’s full capacity
- Funnel
- Rags or absorbent towels
- Gloves
- Filter wrench if needed
- Torque wrench if the manual gives drain-plug or filter-housing torque values
- Wheel chocks
Ramps-only setup
Wheel ramps can work well when the drain plug and filter are both accessible from the front. wikiHow says steel ramps are an alternative to a jack. This setup is often cleaner and faster for front-wheel access on vehicles with enough approach angle and bumper clearance.
Ramps are less useful when the car is very low, the drain point sits far rearward, or the filter is blocked by underbody panels that still need more room.
Jack and jack stands setup
This setup makes sense when ramps do not fit, when more height is needed, or when access requires the vehicle to sit level after lifting. If lifting the front, raise it only as much as needed for safe access and support it properly.
Jack stands are the support method. The floor jack is only the lifting tool.
Drain pan, filter tools, washers, and cleanup items
A drain pan that is too small turns a simple job into a mess. Since many engines need at least a gallon of oil in the crankcase, choose a pan that holds the full used volume with extra room for splash control.
Filter access changes the tool list. Spin-on filters may need a cup wrench or strap wrench. Cartridge filters may need a housing socket and careful O-ring placement. Keep the correct drain-plug washer or gasket ready before you loosen anything.
Is it safe to do an oil change without a jack?
Yes, sometimes. It is safe to do an oil change without a jack when wheel ramps give stable access to the drain plug and filter on level ground with wheel chocks in place. It is not safe to work under a vehicle held only by a floor jack.
When wheel ramps are enough
Ramps are often the simplest option for front-engine passenger cars where both service points are reachable from the front. They also reduce the chance of uneven jack placement and can feel more stable during a basic oil service.
Still, ramps are not universal. Low front bumpers, long overhangs, and limited approach angle can prevent safe loading.
When jack stands are the better choice
Jack stands are better when the vehicle cannot climb ramps safely, when the service points sit farther rearward, or when a splash shield needs more working room. They are also useful when the vehicle needs to sit more level for draining and refilling.
Level ground, wheel chocks, and the floor-jack rule
Work on flat ground. Chock the wheels that stay on the ground. Car and Driver warns never to work under a car held only by a floor jack. That rule has no exception for a quick drain or a one-minute filter swap. (Caranddriver)
How do you change engine oil at home?
To change engine oil at home, confirm the manual’s oil grade, capacity, filter, and washer requirements; raise the vehicle safely if needed; drain the old oil; replace the filter and plug washer as required; refill with the specified amount; then verify level, leaks, and maintenance reset.
Prepare the car and warm it lightly
Gather every part first. Confirm the oil capacity, viscosity, filter type, and drain-plug washer requirement in the manual. Park on level ground and set up ramps or stands if access is needed.
If the engine has been running, let it sit until the oil is warm rather than fully hot so it can drain reasonably well without increasing burn risk.
Drain the oil and inspect the drain plug and washer
- Remove the oil fill cap and dipstick if the manual or service procedure suggests it.
- Place the drain pan under the plug with extra room for the initial stream angle.
- Loosen the drain plug counterclockwise.
- Finish removing it by hand while pressing inward slightly to reduce premature dripping.
- Let the oil drain fully.
- Inspect the plug threads and check whether a sealing washer or gasket must be replaced.
- Reinstall the plug carefully by hand first to avoid cross-threading, then tighten to the vehicle specification if listed.
Drain-plug thread damage usually starts during reinstallation, not removal. If the plug will not thread in by hand smoothly, stop and realign it.
Replace the filter: spin-on and cartridge steps
Replace the filter with the oil change. A spin-on filter should come off with its old gasket attached to the filter. Before installing the new one, inspect the mounting pad and make sure the old rubber gasket did not stick there.
Lightly oil the new spin-on filter gasket with fresh oil, then install it by hand per the filter instructions. Do not stack a new filter on top of an old gasket.
For a cartridge filter, remove the housing cap with the proper socket, replace the element, and replace the specified O-ring. Put the O-ring in the correct groove only, and lightly oil it before reassembly. Misplaced cartridge O-rings are a common leak source.
Refill, check the dipstick, run the engine, and recheck for leaks
- Add slightly less than the full listed capacity at first.
- Reinstall the fill cap.
- Start the engine and let it idle briefly while checking around the filter and drain plug.
- Shut the engine off and wait for the oil to settle.
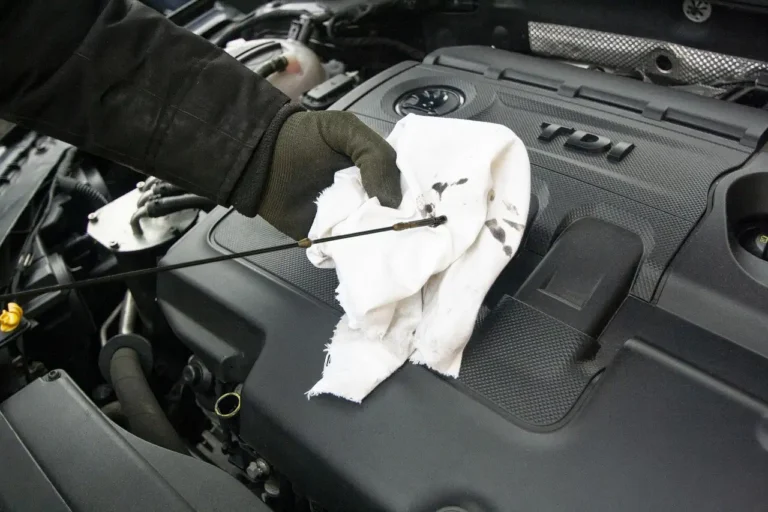
- Check the dipstick and add oil gradually until the level reaches the proper mark.
- Reset the oil-life or maintenance reminder if the vehicle uses one.
- Transfer used oil to a sealed container and bag the old filter for recycling or proper drop-off.
Car and Driver estimates an oil change takes 30–60 minutes. Access often decides where in that range the job lands. Undertrays, cramped cartridge housings, and stuck filters usually add more time than the actual drain.
Car and Driver lists amateur difficulty for a standard oil change. That is fair, but difficulty rises fast when the drain plug is hidden, the filter sits above suspension parts, or the vehicle uses delicate plastic splash-shield clips.
What can go wrong after an oil change?
Most post-service problems come from a short list: too much oil, too little oil, wrong oil spec, a leaking filter seal, a loose or cross-threaded drain plug, a missing washer, a forgotten fill cap, or oil spilled onto a hot exhaust. Every one is preventable with a slow final check.
Overfill, underfill, and wrong oil spec
Underfill risks low oil pressure and poor lubrication. Overfill can cause foaming, leaks, and crankcase ventilation problems. Wrong viscosity or wrong approval spec can affect wear, cold starts, and warranty compliance.
A common first-timer mistake is pouring in the full listed capacity before accounting for oil that has not fully drained or a spec sheet that lists capacity with a dry filter. Add slightly less first, then finish by dipstick.
Filter leaks, double gaskets, and loose housings
A spin-on filter leak often comes from a gasket problem: the old gasket stuck to the engine, the new gasket went on dry, or the filter was left too loose. Double-gasketed filters can dump oil very quickly after startup.
Cartridge systems have their own failure points. The O-ring can be pinched, installed in the wrong groove, or left dry. A housing cap can also be over-tightened or under-tightened.
Drain-plug leaks, stripped threads, and missing washers
If the plug drips after the service, check for a missing or reused sealing washer where a new one is required, damage to the plug seat, or threads that were started crooked. A stripped oil-pan thread is no small issue, and the fix can involve a repair insert or pan replacement.
Start the plug by hand every time. If it resists, back it out and try again. Forcing it with a ratchet is how thread damage starts.
Resetting the oil reminder and cleaning spilled oil
If the vehicle uses a maintenance reminder, reset it only after the service is complete. Otherwise the next interval will be tracked from the wrong point.
Wipe down spilled oil, especially near the exhaust. A little residue can smoke and smell alarming on the first drive, even when the mechanical work is correct.
Frequently asked questions
How often should I change my oil?
Change it by the owner’s manual schedule, which may be based on mileage, time, or an oil-life monitor. Severe use shortens the interval.
How do I change my oil at home?
Confirm the manual’s oil grade, capacity, filter type, and washer requirement; access the underside safely with ramps or stands if needed; drain the oil; replace the filter; reinstall the plug with the correct washer or gasket; refill carefully; then check the dipstick and inspect for leaks.
What tools do I need to do an oil change?
You need the correct oil and filter, a drain-plug wrench or socket, a drain pan, funnel, wheel chocks, rags, and a safe access method such as ramps or jack stands. Some cars also need a filter wrench, a cartridge-housing socket, or splash-shield fastener tools.
Should I change the oil filter every oil change?
Usually, and in normal service it makes sense to replace the oil filter with every oil change. Follow the vehicle’s service guidance, inspect the gasket or O-ring, match the filter type to the vehicle, and make sure the old spin-on gasket did not stay stuck to the engine before installing the new filter.
How long does an oil change take?
Car and Driver estimates 30–60 minutes for a standard oil change. Real time depends on access more than drain speed. Low clearance, splash shields, cartridge filters, and stuck hardware can add time, while an easy-access vehicle on ramps can move faster.