Torque Wrench: How to Choose and Use One
Choose a torque wrench so your target torque falls in the middle 20-80% of its scale: 1/4-inch for inch-pound fasteners, 3/8-inch for many brakes and plugs, 1/2-inch for wheel lugs and larger bolts. Use the wrong range or technique, and you can strip threads, warp brake parts, crack spark plugs, or leave wheel nuts loose. This guide matches wrench types to common car jobs, then shows correct setting, tightening, storage, and calibration checks.
A torque wrench tightens a fastener to a specified torque value, measured in Nm, ft-lb, or in-lb. That value comes from the vehicle or component manual, and it must match the exact fastener, thread condition, and procedure the manufacturer calls for.
Choose by torque range first
Start with range, not brand, screen type, or price. The target torque should sit comfortably inside the wrench’s working span, because a tool near its minimum or maximum is harder to control and easier to misread.
Why usable range matters
Click-type torque wrenches are commonly most dependable in the middle of their scale. Cyclingnews says click-type wrenches are most accurate between 30-80 percent of their indicated range. That makes range selection a job-matching decision, not a minor shopping detail.
Say your wheel fastener spec is high enough that it sits near the top of a smaller wrench’s scale. The wrench may still reach the setting, but the short handle, heavy pull, and reduced margin make smooth technique harder and errors more likely.
Drive size usually follows task type
1/4-inch drive fits low-torque work: interior fasteners, small covers, sensors, and other light-duty hardware. It also fits torque drivers and limiters used for very small fasteners.
3/8-inch drive is the broad middle for DIY car work. It usually suits spark plugs, many brake fasteners, and general service where the torque spec is above small trim hardware but below wheel and chassis loads.
1/2-inch drive belongs on wheel fasteners and larger suspension or chassis bolts. It gives more handle length and usually pairs with higher-range click or split-beam wrenches.
When one wrench is enough, and when it is not
One wrench can cover routine maintenance if the work stays in a narrow band. A 3/8-inch wrench often handles many common service jobs. It does not replace a dedicated wheel wrench, and it does not replace a very low-range tool for delicate fasteners.
Wheel work, engine assembly, and low-torque hardware rarely belong on the same wrench. A beam or click wrench sized for wheel fasteners will not read low settings well. A small torque driver suited to tiny screws or pinch bolts should not be pushed into higher automotive work.
Buying logic by job and budget
Standard torque wrenches often cost between $40-$80. Larger torque wrenches can cost upwards of $150-$300. Digital torque wrenches can cost between $70-$150. The sensible path is to buy the range that matches the jobs first, then choose type and features inside that range. (Thedrive)
📊 The Drive says standard torque wrenches cost between $40-$80. Source: How To Use A Torque Wrench.
What type of torque wrench is best for car work?
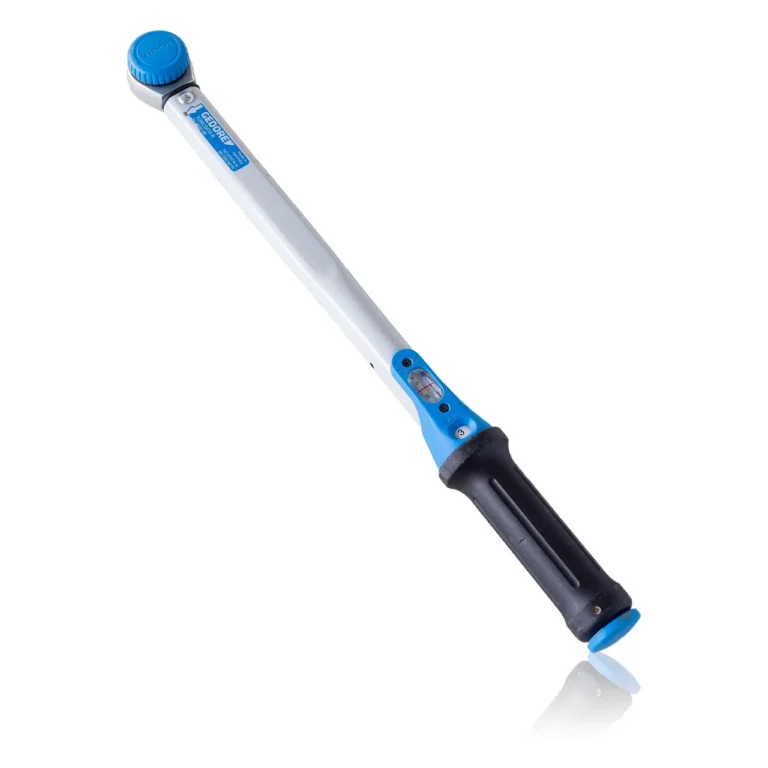
For most DIY car owners, a click-type wrench is the practical default because it is quick to set, simple to repeat, and widely sold in useful automotive ranges. Beam wrenches are simple and budget-friendly, digital models help with readability and units, and limiter or split-beam tools fit narrower jobs.
Click-type: the common automotive choice
A click-type torque wrench uses a spring-loaded deflecting head. When the set torque is reached, it clicks or deflects enough for a tactile signal. wikiHow says torque wrenches stop when they reach a set value, but with a click wrench the safe habit is to stop pulling as soon as the signal appears.
Click-type suits repeated service work because it is quicker to use than a beam wrench and less dependent on a line-of-sight reading. It is the style many DIY owners start with for brakes, plugs, and wheel fasteners, provided the range actually fits the job.
Beam-type: simple, visual, and battery-free
A beam-type wrench uses a pointer over a scale. Nothing clicks. You watch the indicator move as load rises, then stop when the pointer reaches the target mark.
Its main strength is simplicity. It does not rely on a spring release, battery, chime, or internal reset between pulls. It also makes technique errors visible, because you can see overshoot happen in real time.
Digital: easy units and alerts
A digital torque wrench uses a powered display and often adds audible or tactile warnings. The Drive says a digital torque wrench has a backlit screen and warning chimes. That helps when the fastener is awkwardly placed or the scale on a mechanical wrench is hard to read.
Digital models are useful if the manual switches between units, or if the work position makes a beam pointer hard to see. Their weakness is dependence on battery condition and electronics. A dead battery is not a calibration problem, but it can still stop the job.
Limiter, torque driver, and split-beam styles
Very low-torque hardware often needs a torque driver or limiter instead of a full-size automotive wrench. Park Tool says a torque driver range can be 4 to 6 Nm. That style releases at a set torque and is suited to small clamps, rotor bolts, cable pinch bolts, and similar light fasteners.
The same source lists the TW-5.2 torque wrench range as 2–14 Nm, the TW-6.2 range as 10–60 Nm, and the TW-1.2 range as 0–14 Nm. Those figures show why low-torque and mid-torque work often require different tools. Split-beam designs also fit repeated higher-torque work because they avoid the same internal spring setting routine as standard click types.
Torque wrench table
| Car task | Recommended drive size | Recommended torque range approach | Wrench type that fits | Red-flag mistake to avoid |
|---|---|---|---|---|
| Wheel fasteners / lug nuts | 1/2-inch | Use a wrench whose target sits well inside its range, not at the bottom end | Click-type or split-beam | Using the torque wrench to break loose seized lugs; final-tightening with an impact only; skipping the correct tightening pattern |
| Spark plugs | 3/8-inch | Use a mid-range wrench that covers plug specs comfortably | Click-type or beam-type | Starting the plug with the wrench instead of by hand; pulling past the first click; applying a dry-thread spec to lubricated threads |
| Brake components | 3/8-inch | Choose a wrench centered on common service specs, not a wheel-lug wrench | Click-type | Torquing rusty or dirty threads without checking service info; using long adapters carelessly; mixing up bracket and guide-pin specs |
| Interior fasteners and small covers | 1/4-inch | Use a low-range tool; large automotive wrenches are too coarse here | Beam-type or torque driver / limiter | Using a 3/8-inch or 1/2-inch wrench at its extreme low end; crushing plastic or threaded inserts |
| Engine assembly fasteners | 1/4-inch, 3/8-inch, or 1/2-inch depending on the step | Match each stage to the fastener spec and any torque-angle procedure | Click-type plus angle gauge where required; beam-type for visual confirmation | Assuming one wrench covers every step; ignoring oil or sealant instructions; treating torque alone as enough when the manual also calls for angle tightening |
| Low-torque clamps and small pinch bolts | 1/4-inch | Use a dedicated low-range tool near the middle of its scale | Torque driver / limiter | Using a large click wrench that barely moves at the needed setting; mistaking ratchet resistance for torque signal |
How do you set a torque wrench properly?
Set the wrench by checking the exact torque specification and units first, then matching that value to a wrench that covers it comfortably. On a click wrench, release the handle lock, dial the main and fine scales to the target, and relock it. On beam and digital tools, confirm the correct scale or unit before pulling.
Find the exact spec and unit
wikiHow says the wrench should match the specific torque recommended in the manual. That means the vehicle manual, factory service procedure, or component instruction. The spec may be listed in Nm, ft-lb, or in-lb, and the thread condition may matter just as much as the number.
If the procedure says dry threads, use dry threads. If it says lightly oiled, sealant-coated, or new bolts only, follow that condition. The torque figure and the prep condition work together.
Set a mechanical click wrench step by step
- Read the target torque and unit from the service information.
- Check that the wrench range covers that value comfortably.
- Release the handle lock or end cap, depending on the design.
- Turn the handle until the main scale reaches the nearest whole increment below the target.
- Use the micrometer or fine scale to add the remaining increment.
- Align the marks carefully and relock the handle.
- Set the ratchet direction for tightening if the design requires it.
A common first-timer mistake is landing one line past the intended micrometer mark on a 3/8-inch click wrench. The handle feels set, but the wrench is actually above the target before the fastener ever sees load.
How do I read a torque wrench scale?
On a beam wrench, hold the tool so the pointer floats freely and read the scale straight on, not from an angle. On a click wrench, read the main shaft scale plus the fine handle scale together. On a digital wrench, confirm the unit on the screen before tightening.
Beam-style readings are easy to skew with parallax. If the pointer is viewed from the side, the line can appear to hit a different mark. Keep the handle centered as the design intends, because side pressure changes the reading.
Digital models reduce scale-reading errors, but they create a different risk: the wrong unit. A screen set to one unit while the manual lists another can lead to a very wrong result with no obvious warning.
How do you properly use a torque wrench?
Start the fastener by hand, seat it first, then pull the torque wrench smoothly from the handle until it clicks, reaches the pointer mark, or gives its digital alert. Keep the tool square to the fastener, avoid jerky force, and stop at the first signal. Do not use the wrench as a breaker bar.
Pre-use checklist
| Check | What to confirm before tightening |
|---|---|
| Spec and units | Exact fastener spec, correct unit, and any dry/oiled/sealant condition |
| Tool condition | No obvious damage, bent beam, cracked housing, sticky ratchet, or dead battery |
| Range match | Target torque sits well inside the wrench range |
| Fastener condition | Threads and seating surfaces are clean if the procedure requires it; no visible cross-threading or burrs |
| Thread start | Fastener starts by hand and seats normally before the wrench is used |
| Socket setup | Correct socket, fully seated, with only needed extensions or adapters |
Pull technique matters
Grip the handle where the maker intends. Pull in a slow, steady motion. Keep the wrench square to the fastener so the load stays in line with the head. Jerking the handle can overshoot before the mechanism reacts, especially on click types.
For wheel fasteners, snug them in the correct pattern first, then do the final pass with the torque wrench. Wheel fasteners are one of the clearest cases where a torque wrench belongs in the process, because the clamping load affects wheel seating and brake rotor behavior.
Stop at the signal
With a click wrench, stop at the first clear click or deflection. With a beam wrench, stop when the pointer reaches the target. With a digital tool, stop at the programmed alert. With a limiter or torque driver, stop when it releases.
One more pull after the click is still more torque. That is a common source of stripped threads and crushed sealing surfaces.
Extensions, adapters, and crowfoot fittings
A straight extension usually does not change the torque reading in normal use. A crowfoot or offset adapter can change the effective lever length if it extends the wrench. If the service setup requires that kind of attachment, use the method the tool or procedure specifies rather than guessing.
Picture a brake fastener reached with a long crowfoot pointed straight out from the wrench head. The tool still clicks, but the geometry has changed, so the fastener may see more torque than the scale suggests.
Why the same torque can give different clamping force
Torque is only a proxy for bolt stretch and clamp load. The real goal is fastener preload, the clamping force created when tightening. Thread friction, lubrication, washers, coatings, dirt, paint, burrs, and seating surfaces all affect how much of the applied torque becomes useful preload.
Preload is the reason the number matters
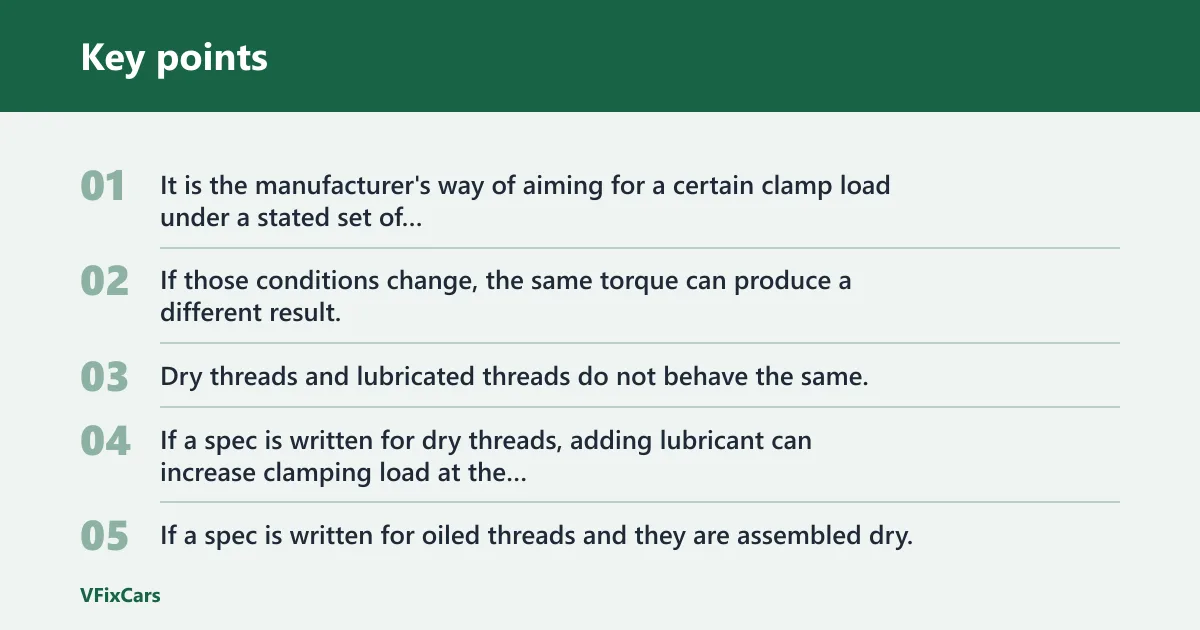
A torque spec is not magic. It is the manufacturer’s way of aiming for a certain clamp load under a stated set of conditions. If those conditions change, the same torque can produce a different result.
Dry threads and lubricated threads do not behave the same. If a spec is written for dry threads, adding lubricant can increase clamping load at the same torque. If a spec is written for oiled threads and they are assembled dry, clamp load may end up lower than intended.
Bad threads can fake a correct torque reading
Cross-threading, rust, debris, damaged threads, paint buildup, and burrs raise friction. The wrench may click at the right number while the fastener has not actually achieved the intended clamp load. That is why a click alone is not proof of a sound joint.
Washer condition and the seat under a nut or bolt head matter too. A rough or contaminated seat adds friction in a place the torque wrench cannot distinguish from real clamping work.
Torque angle changes the process
Some engine and structural procedures use torque plus angle rather than torque alone. In those cases, the first torque step seats the joint, and the angle step controls bolt stretch more directly. A normal torque wrench still matters, but it is only part of the process.
Do torque wrenches work in both directions?
Some do, some do not, and the ratchet’s ability to turn backward is not proof of reverse torque accuracy. A torque wrench may ratchet in both directions for convenience while being calibrated for tightening in only one direction. Check the tool documentation before using reverse torque for anything critical.
Ratchet direction is not calibration direction
Many torque wrenches can physically turn clockwise and counterclockwise. That only tells you the head can drive the fastener from either side. It does not tell you the torque mechanism is certified or intended to measure accurately in both directions.
The same source says the ATD-1.2 is used only for setting torque clockwise. That is a clear example of why reverse operation cannot be assumed from the ratchet alone.
Why this matters on car work
Left-hand thread applications are uncommon for most DIY car tasks, but access issues are common. If a service position makes the tool feel backward, confirm the documentation before trusting the reading.
A torque wrench is not a breaker bar
Do not use a torque wrench to loosen seized fasteners unless the manufacturer explicitly allows it. Shock loads, overloads, and long cheater bars can damage the mechanism and shift calibration.
Why is my torque wrench not clicking?
If a click-type torque wrench is not clicking, the usual causes are wrong setup, wrong range, a fastener already tighter than the target, or pull technique that masks the signal. Actual tool failure is possible, but it should be separated from user error, overload damage, or calibration drift before blaming the wrench.
Common setup mistakes
The wrench may be set below its working range, or the handle may not be locked after adjustment. On some tools, the setting can sit at minimum without enough spring load to behave normally if the user expects a stronger click than the design gives.
A too-large wrench on a low-torque job is another common cause. The mechanism may technically be set, but the signal can be faint and the scale may be too coarse for the task.
Technique errors that hide the click
Pulling too fast can blow past the signal. Grabbing the shaft instead of the handle changes leverage and feel. Pushing at an angle can bind the head and make the click harder to sense.
Suppose a 1/2-inch click wrench is set for a moderate fastener, but the user yanks the handle in one quick motion. The fastener moves, the wrench gives a muted click, and the pull continues past it before the hand reacts.
When the fastener is the real problem
If the threads are dirty, galled, cross-threaded, or already over-tight, the wrench may behave oddly or click almost immediately. That does not confirm the joint is correct. It can mean friction has become the dominant load instead of clamp force.
Signs of drift, overload, or damage
Repeated unexplained mismatch against another known-good tool, a wrench that was dropped, a beam pointer that no longer rests at zero, or a click wrench that suddenly feels inconsistent all point to service or calibration needs. Those symptoms differ from bad technique because they persist even with careful setup.
How should you store and calibrate a torque wrench?
Store the wrench clean, protected from impacts, and matched to its design. Click-type wrenches should be returned to their lowest scale setting after use, not left wound up. Calibration should follow use frequency and any damage event, with immediate checks after a drop, overload, or suspected drift.
Torque wrench checklist
| After-use item | What to do |
|---|---|
| Click-type setting | Return to the lowest value on the scale, not a higher stored setting |
| Cleaning | Wipe off dirt, oil, and metal dust |
| Storage | Store in its case or a protected drawer; avoid loose tool piles |
| Impact control | Avoid drops, hammering, or using it to loosen seized fasteners |
| Tracking | Note heavy use, overload events, and any suspected bad readings |
| Drift symptoms | Check any weak click, off-zero beam pointer, odd ratchet feel, or inconsistent result before trusting it again |
Why click-type wrenches go back to minimum
The same source says click-type torque wrenches should be wound down to the lowest value on the scale when not in use. That reduces long-term spring stress inside the mechanism. It does not mean turning below the marked minimum; it means storing at the minimum specified setting.
How often should a torque wrench be calibrated?
Frequent-use torque wrenches need scheduled calibration, while occasional-use tools need event-based checks after drops, overloads, or suspicious readings. The same source recommends calibration every 5000 clicks for frequent-use wrenches. A lightly used DIY tool may go much longer, but damage, poor storage, and long inactivity can still affect accuracy.
Calibration is a maintenance need for any precision fastener tool. Frequent use, shock, overload, and bad storage can all move the reading away from the true value. A tool that has sat for a long time should at least be inspected and used cautiously on a noncritical task before returning to high-risk jobs.
Bad technique versus true calibration drift
- Likely technique issue: readings improve when the pull becomes slower and straighter; problem appears only with one awkward fastener; no visible tool damage.
- Likely drift or damage: the beam no longer rests at zero, the click feels inconsistent across several jobs, or the wrench was dropped or overloaded.
Frequently asked questions
What torque wrench range do I need for lug nuts?
You need a wrench whose wheel-fastener target falls comfortably inside the tool’s usable range, usually on a 1/2-inch drive wrench. Avoid using a smaller wrench near its upper limit or a very large wrench near its lower limit for final wheel tightening.
How necessary is a torque wrench for basic maintenance?
It is highly necessary for wheel fasteners, spark plugs, brake hardware, and engine work where clamp load matters. It is less critical for some low-risk trim tasks, though a small low-range tool still helps prevent stripped inserts and cracked plastic parts.